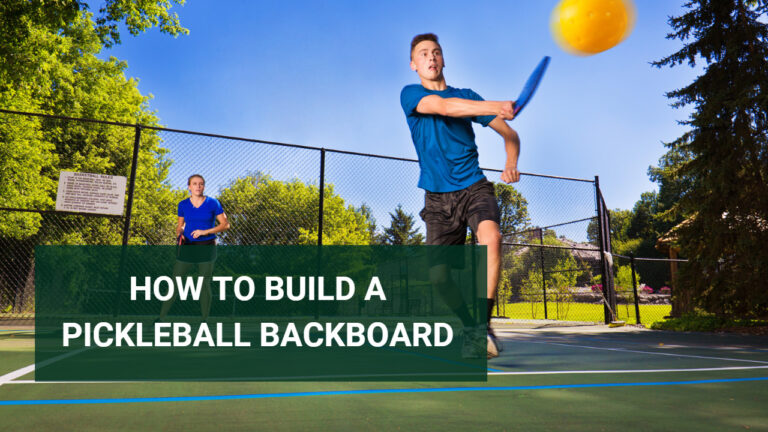
How To Make A Pickleball Rebounder- Step by Step Guide
Elevate your pickleball game with a rebounder. Practice shots, improve accuracy, and dominate the court with your custom-built tool!
To make a pickleball rebounder, gather PVC pipes, connectors, netting, and bungee cords. Assemble the PVC frame, attach the netting using bungee cords, and set up securely. Start practicing and enhancing your pickleball skills with your homemade rebounder!
We’ll guide you through five simple steps on how to make a pickleball rebounder. Yes, that’s right – it’s time to get crafty and build the ultimate training partner! So grab your tools and let’s dive into the world of DIY pickleball equipment.
How To Make A Pickleball Rebounder – 5 Simple Steps
Are you ready to create your very own pickleball rebounder? I’ve got you covered with these 5 simple steps to get you started.
By following these five steps diligently with creativity along with precision execution; voila! You’ll have yourself a homemade pickleball rebounder tailored specifically to meet your practice needs!
Remember that building a pickleball rebounder requires careful planning but can be an exciting DIY project allowing you complete control over its features!
So why not embark on this journey? Get ready to elevate your pickleball skills with a rebounder that you made yourself!
1- Decide What Size Rebounder You Need
When it comes to creating your own pickleball rebounder, choosing the right size is super important. So, let’s break it down.
- As a starting point, check out the space you have available. Measure it up and see how much room you’ve got to play with. This will help you decide if you need a smaller or larger rebounder.
- Now, think about your skill level and playing style. If you’re just starting or prefer shorter rallies, a smaller rebounder might do the trick. But if you’re a pro or love fast-paced action, a bigger rebounder could be more up your alley.
- Ultimately, go with what feels right for you. Maybe you want to start small and build your confidence before going big. Or maybe you’re up for a challenge right from the get-go and want to aim for a larger target.
Consider these factors – space, skill level, and personal preference – and you’ll be able to choose the perfect size for your pickleball rebounder. Get ready to create a custom tool that’ll take your skills and enjoyment of the game to new heights!
2- Make A Plan
Sure! When making a pickleball rebounder, it’s important to have a solid plan. Before you start gathering materials and cutting pieces, take some time to figure out the design and size of your rebounder.
- Think about where you’ll use it, indoors or outdoors. This will help you determine the right size and durability for your project.
- Consider the frame material. PVC piping is a popular choice because it’s affordable and easy to work with. But if you want something stronger, you can go for metal pipes instead.
- Also, decide on the angle of the rebounder. A slight incline will give you a challenging bounce while still making it easy to retrieve the ball.
- Moreover, think about adding extra features to enhance your experience. You can create target zones or adjust the net tension to add more variety and improve your skills during practice.
Remember, planning ahead will save you time and prevent frustrations. Take measurements, sketch your ideas if necessary, and make sure you have all the parts before you start building your pickleball rebounder!
3- Gather The Necessary Parts
To successfully build your pickleball rebounder, you’ll need to gather the necessary parts. Before diving into this step, it’s important to have a clear understanding of what materials are required for your specific project. Here are some essential items you may need:
- Plywood or particle board: This will serve as the base for your rebounder. Make sure to choose a sturdy and durable option.
- PVC pipes: These will be used to create the frame of your rebounder. The size and length of the pipes will depend on the dimensions you’ve decided upon.
- Connectors: To join the PVC pipes together, you’ll need connectors that fit snugly and securely.
- Bungee cords or nylon netting: Either one can be used to create the surface where the ball will bounce off. The choice between bungee cords or netting depends on personal preference.
- Screws, nails, or adhesive: Depending on how you plan to assemble your rebounder, make sure you have the appropriate fasteners at hand.
- Tools: Don’t forget about essentials such as a saw (for cutting plywood), drill (for making holes), screwdriver/nail gun (for securing components), measuring tape (to ensure accurate dimensions), and sandpaper (to smooth any rough edges).
Remember that these are just general guidelines; feel free to modify based on your individual needs and preferences! Gather all these parts before moving onto the next step in building your own pickleball rebounder!
4- Cut Your Materials
Now that you have all the parts for your pickleball rebounder, it’s time to move on to cutting. This step is important because it determines the size and shape of your rebounder.
- Before you start cutting, make sure you measure everything accurately based on your plan. Double-checking measurements will help you avoid mistakes. Once you’re sure, grab your saw and get ready to cut.
- Take each piece of material one by one and cut them carefully according to the dimensions in your plan. Remember, precision is crucial – even a small error can affect how well your rebounder works.
- As you cut, take your time and avoid rushing or using too much force. Slow and steady is the way to go. If you need breaks, take them, but stay focused on making clean cuts every time.
Once all the pieces are cut, set them aside and take a moment to admire your progress! It’s exciting to see all the individual components coming together. Now that you’re done with this step, let’s move on to assembling your DIY pickleball rebounder!
5- Build Your Rebounder
Building your own pickleball rebounder is a fun and rewarding project. Once you have all the parts, let’s put everything together!
- Start by attaching the netting to the frame. This will give you a surface for the ball to bounce off. Make sure it’s secure so it doesn’t sag or come loose during play.
- Next, attach the legs to the frame. They’ll provide stability, keeping the rebounder in place while you practice your shots. Use screws or nails to secure them, depending on the materials you have.
- Take a moment to double-check all the connections and make any necessary adjustments. You want everything to be sturdy and secure before you start using it.
- Now, it’s time for a test run! Hit some balls against the netting and see how they bounce back at you. Make any adjustments you need until you’re satisfied with how it performs.
Remember, building a pickleball rebounder takes time and patience, but it’s worth it for the improvement it can bring to your skills on the court. So go ahead, start creating your own DIY pickleball rebounder today!
Pickleball Rebounders & Their Sizes
Pickleball rebounders come in different sizes to suit different needs and spaces. If you’re a beginner or have limited space, a smaller rebounder is a great choice.
It offers a smaller hitting surface but still helps you improve your strokes and volleys. Plus, it’s portable and easy to set up anywhere you want.
If you have more space and want a rebounder that resembles a real court, go for a larger size. These models often have adjustable angles for challenging drills and can accommodate multiple players.
Choose the size of your pickleball rebounder based on your goals and playing environment. Whether it’s big or small, this training tool will definitely boost your skills on the court!
Why Use A Pickleball Rebounder?
Well, there are several reasons why incorporating a pickleball rebounder into your training routine can greatly enhance your skills and overall gameplay.
- You can practice shots from different angles and distances, improving hand-eye coordination and reaction time on the court. By consistently hitting balls off the rebounder, you become more comfortable returning unpredictable shots in real games.
- Using a pickleball rebounder sharpens your reflexes and concentration. The repetition strengthens physical reflexes and mental focus, helping you anticipate shot placement and respond quickly with precision.
- A pickleball rebounder adds variety to your workouts, offering an alternative way to practice when other players or courts are unavailable. You can work on various shots like drives, lobs, dinks, volleys, and smashes.
- Both beginners and experienced players benefit from a pickleball rebounder. It allows you to focus on specific areas for improvement, such as footwork or stroke mechanics, separate from regular match play scenarios.
Consistent and appropriate use of a pickleball rebounder enhances your skills and performance. It offers the opportunity to practice shots that may not be possible with others, conditioning your reflexes for faster and accurate returns in real games.
What about a DIY Pickleball Rebounder?
Building your own pickleball rebounder can be a cost-effective and enjoyable project. You can customize its size and features to suit your needs by choosing materials such as wood or repurposed items. Basic carpentry skills are necessary, but online resources provide step-by-step instructions. Adjustments can be made to match your playing style or skill level. Prioritize safety by using the right tools and taking precautions during construction.
How To Use A Pickleball Rebounder Wall
Using a pickleball rebounder wall enhances practice and boosts skills.
- Start a few feet away, focusing on accuracy and control.
- Gradually increase shot intensity and experiment with angles and spins.
- Vary footwork, practicing defensive and offensive moves.
- Incorporate drills for specific areas like volleys or overhead smashes.
Consistent practice brings significant improvements.
Conclusion
Building your own pickleball rebounder can enhance your game, offering convenience, customization, and cost-effectiveness. With five simple steps, you can create a personalized training tool that improves your shots, accuracy, and overall gameplay. Practice whenever you want, refine your skills, and enjoy the satisfaction of crafting your own rebounder. Start today and become a better pickleball player!
FAQs
What are pickleball rebounders made of?
Pickleball rebounders are typically made of materials such as PVC pipes for the frame, netting for the rebounding surface, and bungee cords to secure the netting.
How do you make a pickleball practice wall?
To make a pickleball practice wall, you can use a variety of materials such as plywood, concrete, or cinder blocks to construct a solid wall with dimensions that suit your needs.
What is the best material for a pickleball practice wall?
The best material for a pickleball practice wall depends on personal preference and availability. Plywood is often used due to its affordability and versatility. Concrete or cinder blocks offer durability and a consistent bounce.
How can I practice pickleball at home?
You can practice pickleball at home by setting up a pickleball rebounder, using a practice wall, or converting a suitable space into a mini court. You can also practice drills, footwork, and technique without a net.
What surfaces can you play pickleball on?
Pickleball can be played on various surfaces such as indoor courts (usually made of wood or rubberized material) and outdoor courts (typically made of asphalt or concrete). Some surfaces may require specific shoes for optimal traction and safety.